Your Food Looks Delicious–Food Photography Tips
all food is not created equal—you can't make everything look good. But as a food marketer, food photography has to make mouths water and stomachs rumble. Learn how to do just that and more!
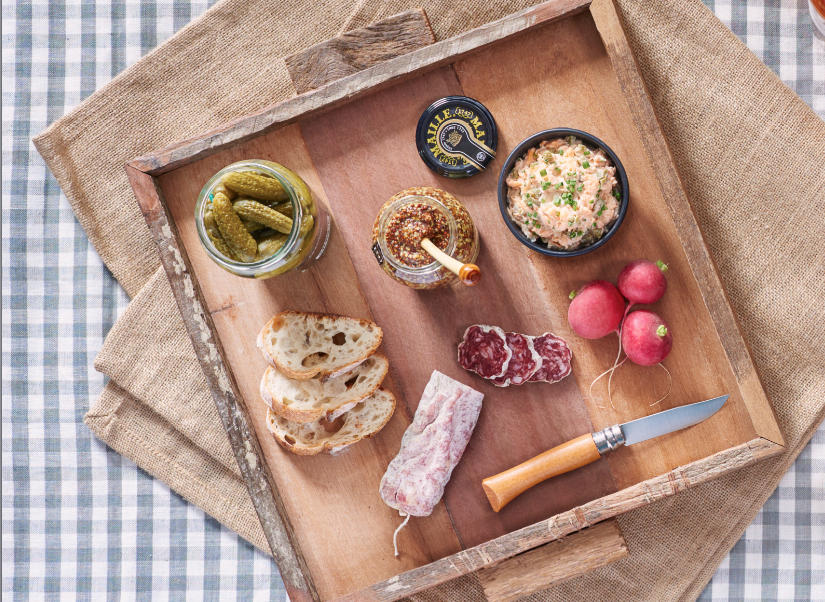
Perspective–Make It Appetizing
The way you angle your shot goes a long way to driving likes, shares, and engagement. You have to make it appetizing to your audience. The question when you take your shot is, “Would I eat this?” There are two different angles you can take your shot: overhead and low. The overhead angle works best when there are multiple components you want to take a picture of such as a charcuterie plate or a table full of food. Low angle works if you want to focus on a particular dish or part of a dish like a crepe with its filling or a sandwich. The textures of the food should stand out as if you’re ready to eat it. You can also do a mix of an overhead and low angle shot depending on the depth and height of whatever food you are taking a picture of. Take multiple shots if you have to. It’s good to have options.

Lighting–All Natural
Natural lighting is your friend; colored lighting is your enemy. If you can find it, natural lighting is great because the colors of your food will pop right off the screen. Depending on where you live and the season, you’ll have a period when the lighting is just right–Usually late morning to mid-day is the perfect time for natural lighting. Having too much lighting can cause your photo to be washed out and/or have an unnecessary glare. Thus, having curtains or a simple white board to minimize and/or reflect the light will do wonders to your food photography.
Colored lighting masks the true color of the food giving it a look that may not seem appealing. The biggest culprit is yellow light because it’ll make your delicious food seem like it is not cooked properly or just plain bad so it’s best to avoid it. If you can’t avoid it, having another person with a mobile flash will help a bit.

Styling–The Details
The details in the photo can make or break your picture. You have to look at everything with a critical eye as a food photographer. There is a multitude of ways to enhance your dish and getting into the fine details is an essential component for “the shot” you want.
Choose your plate wisely so the dish stands out. There are so many shapes, sizes, and colors of plates nowadays but when working with food, less is more. Hence, small, round plates with little to no patterns should be your go to.
Garnish effectively, if at all. Dress up your dish with fresh herbs, toppings, and condiments if it feels like its too one-dimensional or dull. Just make sure they make sense with the dish and not randomly paired.
Keep the props to a minimum to avoid clutter. Food photographers use utensils, napkins, and even ingredients they used in the dish to fill up space. However, having too many props will make the shot seem cluttered. More is less.
Clean your accessories to prevent distraction. A dirty fork never looks nice unless it is intentional. Check for the mess for success.
Interact with the food. Grab the taco in your clean, well-manicured hand as if you’re about to eat it. Take a bite of that sandwich. You want to eat the food so interacting with it makes for a nice touch.
The best tip to remember is make sure the food is the star. You don’t need fancy equipment. Simply implementing these three food photography tips of perspective, lighting, and styling will give your food a professional quality.
About the Author
Raymart is a Social Media Manager at TDT who loves NYCFC, Kpop, and doughnuts. His spiritual social media channel is Instagram, and he craves food all the time. Mostly doughnuts.